Events
To manage events, navigate to the Events page in the Posts section of your Neleto instance.
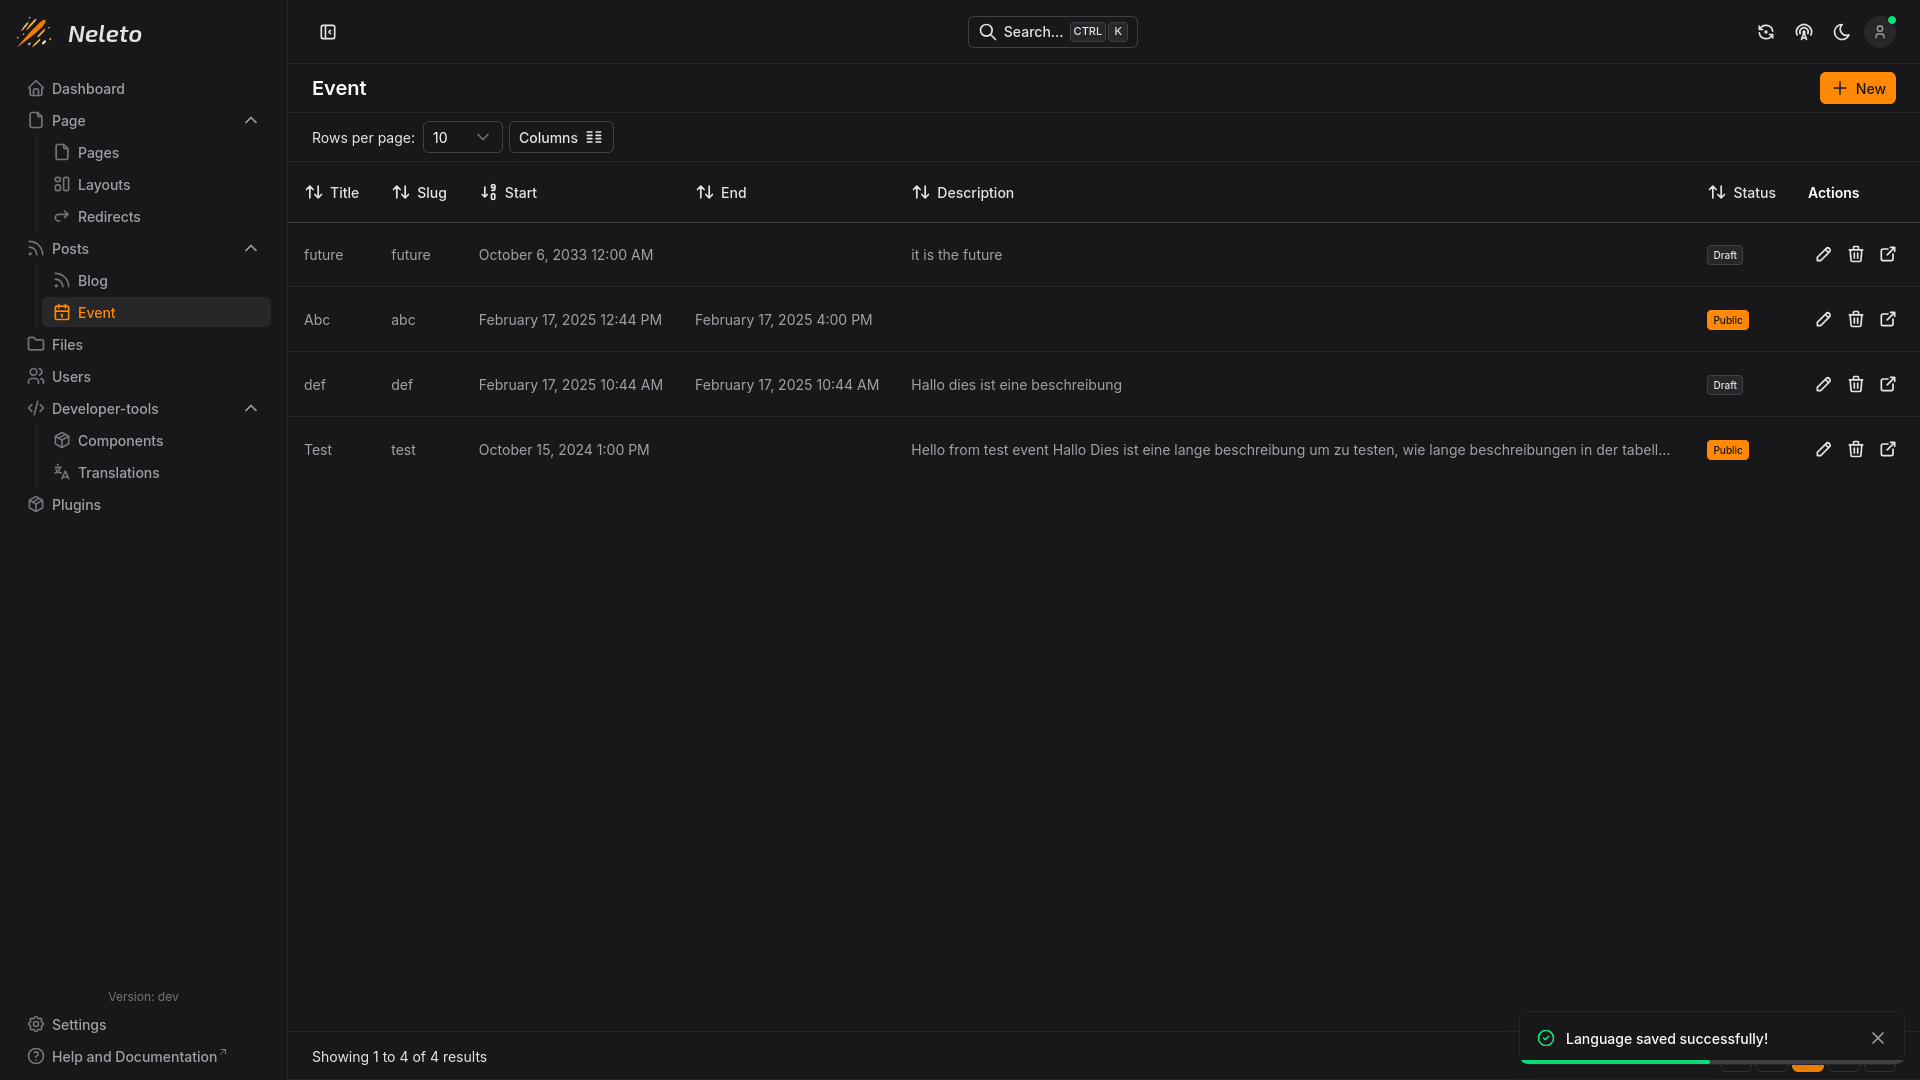
You should see something like this:
Creating a New Event
To create a new Event post, click the + New button in the top right.
You should see a page similar to editing blog posts:
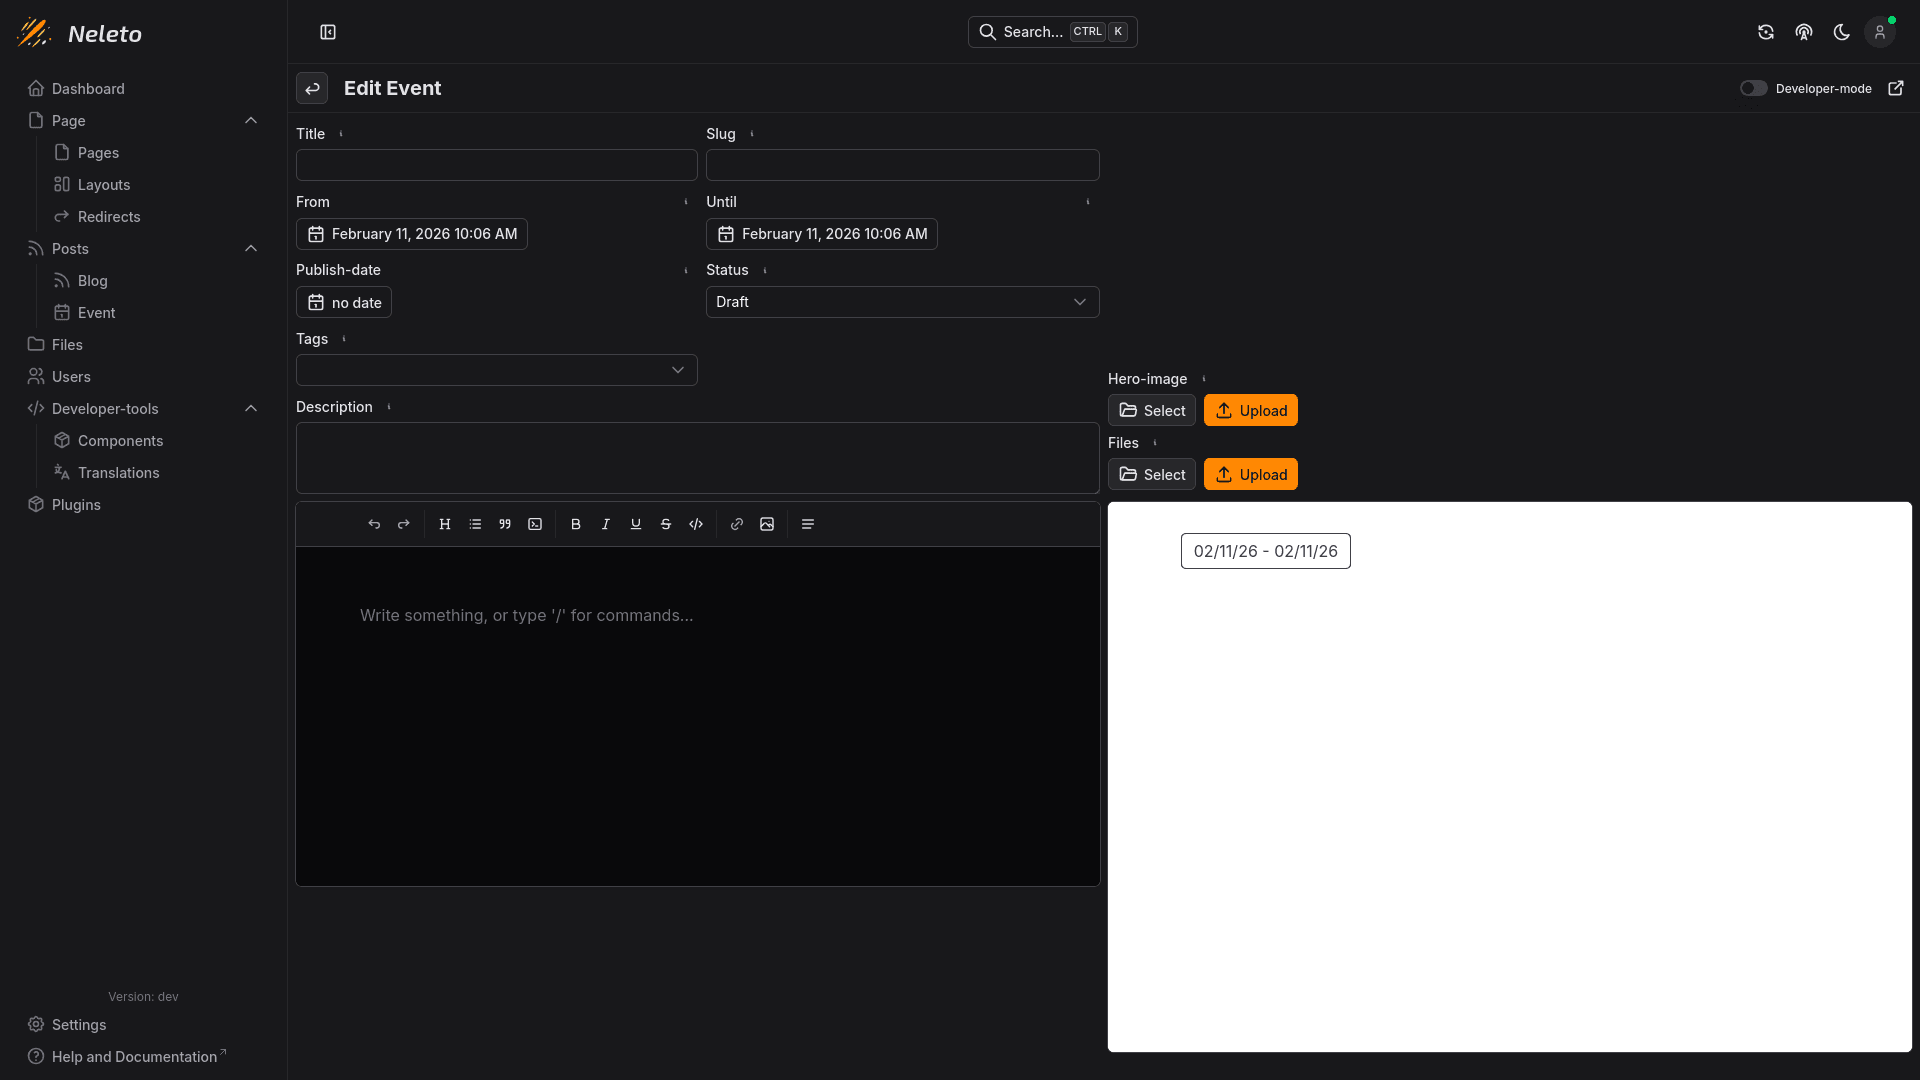
Options
Here are the options you can set on an event:
Title
The title of the event, which depending on your event post content Component will be displayed as the title of the page and/or tab in the visitor's browser.
Slug
This is part of the url when someone visits this event.
From
The start date of the event.
Until
The end date of the event.
Status
The status dictates whether the event is publicly accessible or only to logged
in users. Set this to Public to make it visible to everyone, or set it to
Draft to hide it from visitors.
Tags
Tags allow you to group your event together in the event list component.
Description
The description of your event will be used for SEO (Search Engine Optimization), depending on your event content component.
Hero image
Here you can set a cover image for your event. Your event content component dictates how/if this is rendered when visiting this event.
Files
Here you can attach files to your event.
Content
Here you can write the content of your event. By default this is a rich
text editor, similar to your word processing program, but if your role is
either developer or admin, you can turn on Developer mode in your profile
settings or in the top right to just use a normal code editor and write plain HTML.
To the right of the content editor, you can see a preview based on your defined event page and event content component.