Pages
Creating a new page
To begin, select the Pages item under Page in the sidebar on the left.
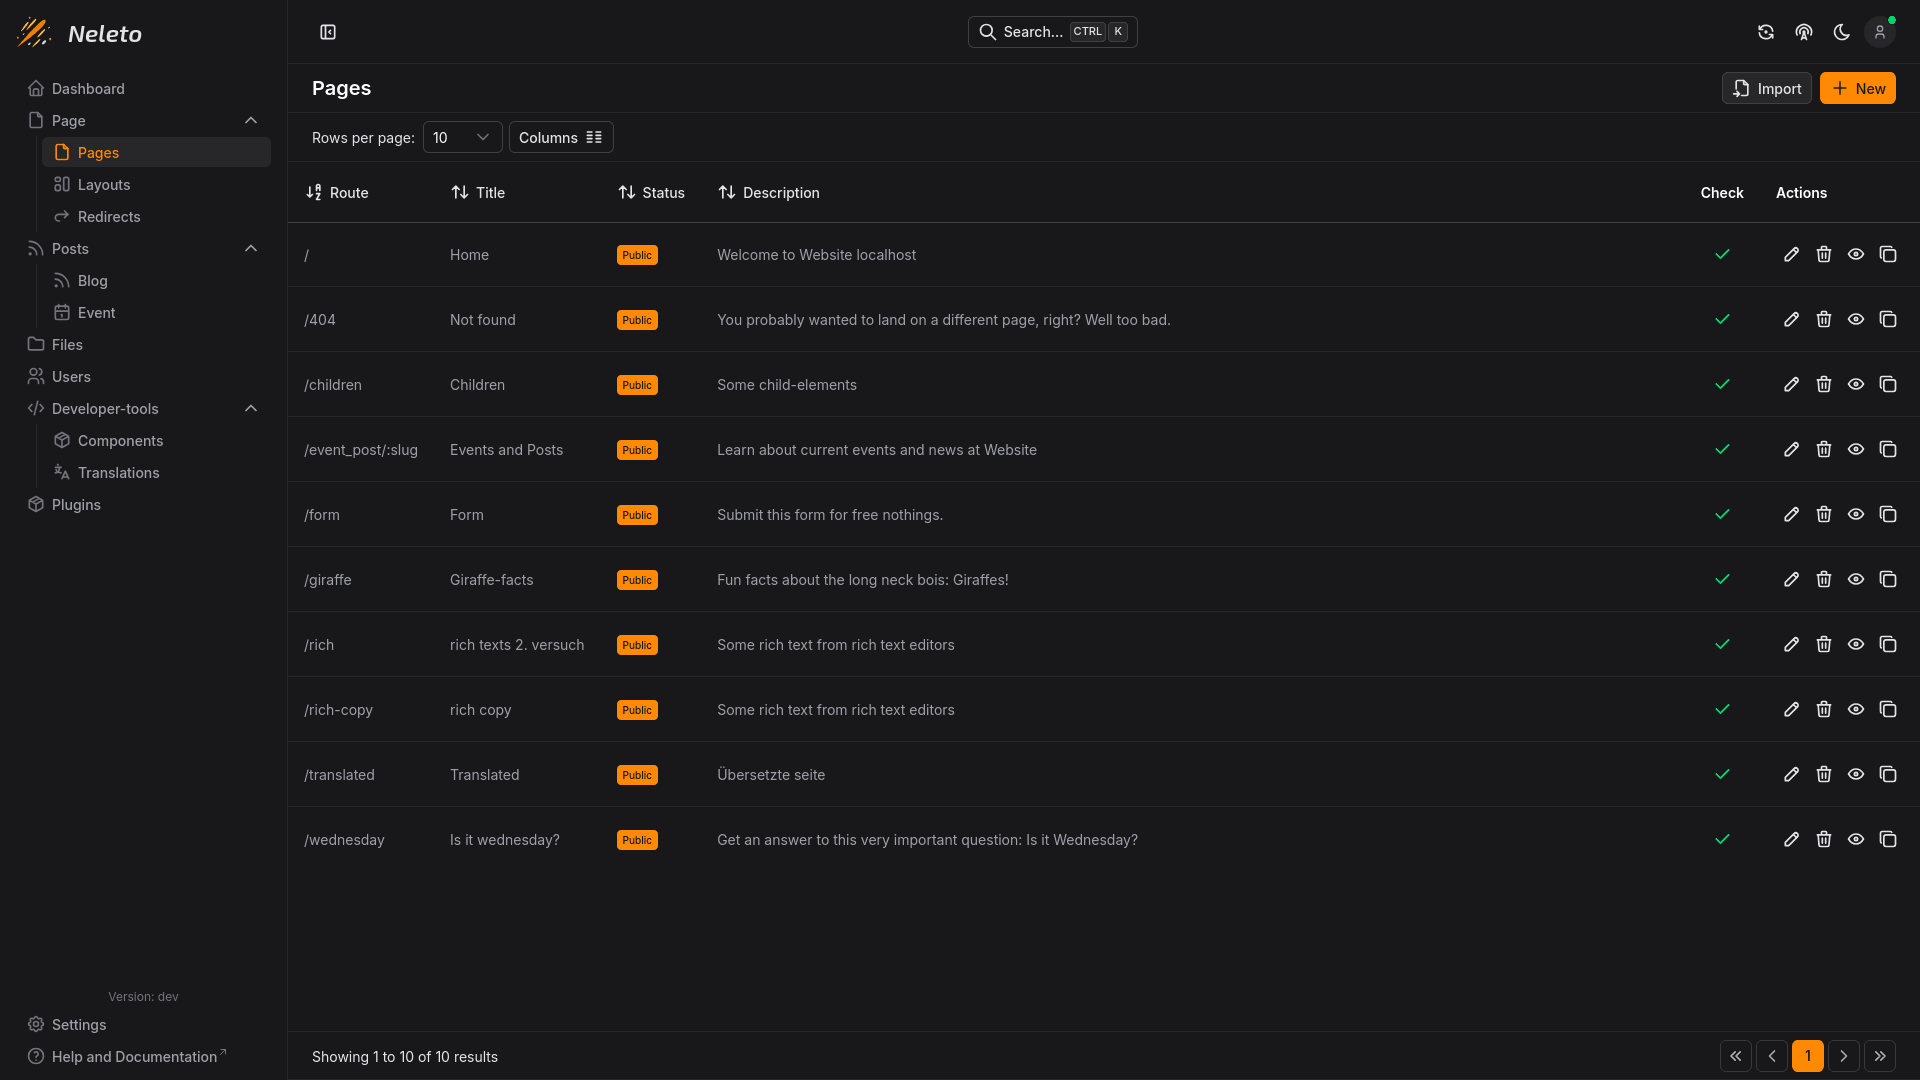
To create a new page, simply click on the + New button in the top right. Or
you can import your pages from an existing website using the Import button (Import pages).
You can also edit a page by clicking the , or open any page using the . The button will delete the page.
When you edit or create a page you will be redirected to the page builder:
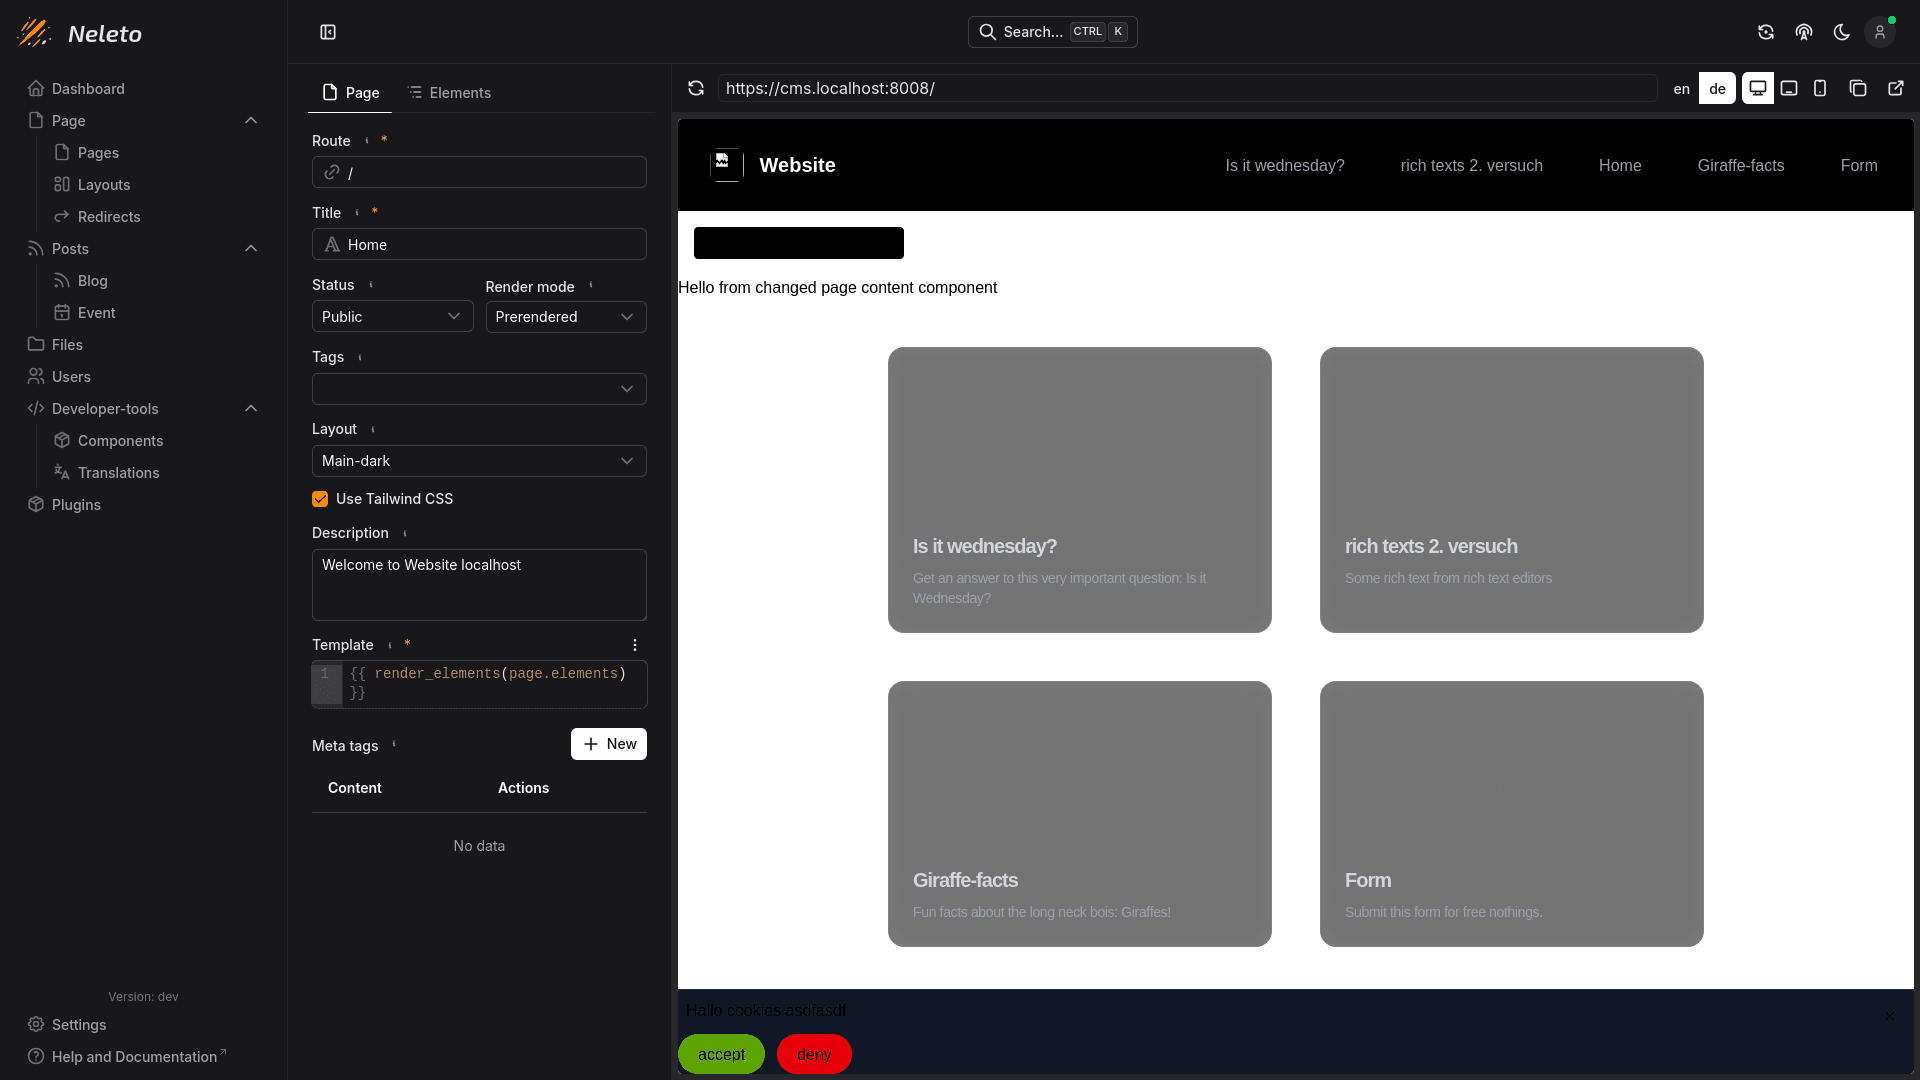
This is a powerful editor for all details and content on your page. You can see changes reflected immediately with the large preview.
Options
Here are all the options you can set on a page:
Route
Every page needs a route which defines where the page can be found on your website.
For a landing page, the route / is a good choice, since this is the default
route users will visit when landing on your website.
You can also use path parameters in the route of any page, such as
/post/:slug. These parameters will then be available in the template of the
page and components with their name, in this case the name is slug. This
is necessary for a page to display blog posts or events properly. More on Blog
post and Event pages here.
Title
You can label your page in the Title field,
such as Home, to differentiate it from other pages. This title will also be
used in the <title></title> element for this page.
Status
The status dictates whether the page is publicly accessible or only to logged
in users. Set this to Public to make it visible to everyone, or set it to
Draft to hide it from visitors.
Render mode
You can optimize your website by setting the render mode to Prerendered. This
will cache the rendered HTML of this page on the server allowing for a quicker
response to visits. The Dynamic render mode will render the page on every visit.
If you have content loaded on your page which changes frequently, you might get
better results with Dynamic otherwise you should prefer Prerendered.
Tags
Tags are used to group pages together. Tags can be used to filter pages, when loading them on other pages.
Layout
Here you can select the layout this page will be rendered in. A layout lets you reuse elements across pages, if you define them in the layout. Read about layouts here.
Use Tailwind CSS
With this checkbox you enable Tailwind CSS for this page. This will make it easier to style your page and elements without using custom CSS. We recommend leaving this on unless you experience issues with styling your page.
Description
The description of your page will be shown in search results and in the meta section of the rendered HTML.
Template
The template defines how your page is rendered. You could code your entire page in here, if you don't want to use the power of elements.
If you want to use elements (which we recommend), you need to make sure your page's template includes this:
{{ render_elements(page.elements) }}
This will make sure all elements defined in the elements tab are rendered correctly on the page.
Meta tags
These allow you to define additional metadata for your page, they are included automatically in the rendered HTML. You can read more technical information about HTML meta tags here.
Elements
Here you can add elements to your page. Elements are based on Components and
can define additional data themselves. You can manage all elements on one page
in the Elements tab:
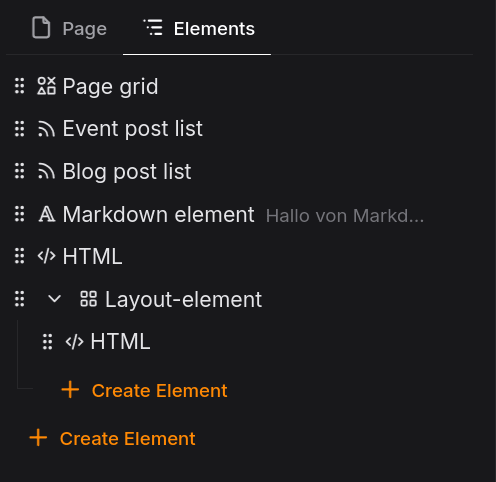
Here you see a list of all the elements on this page. For this image we created some components and some elements using them.
You can add new elements with the + Create element button, which will create
an element at that position in the tree.